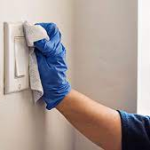
Installing a new shower faucet doesn’t have to be a daunting task that takes days of your time, especially if you know how to install it. This blog article will show you the basics and provide some helpful tips and tricks for installing your new Pfister shower faucet today.
Why Install A Pfister Shower Faucet
Installing a Pfister shower faucet can be a great way to update your bathroom without spending a lot of money. These faucets are known for their high-quality construction and features, like extra-strong handles and sturdy bases. In this guide, we’ll show you how to install a Pfister shower faucet from start to finish.
First, you’ll need to remove the old shower head. On most models, this is done by unscrewing the base of the fixture and removing it. You may need to use a towel or rod to pry off the sprayer if it’s stuck. Once the head is free, unscrew the stem from the base and remove it.
Next, measure your new shower head and buy the corresponding adapter if necessary. You’ll also need some Plumber’s Putty (or other sealants) and watertight screws to complete the installation. Use a level to make sure everything is straight before screwing in the screws.
Finally, put the new head on and screw it on securely. Test the water flow by turning on the water supply and waiting until it comes out hot before closing the door. Once everything is working fine, clean up any excess Plumber’s Putty and re-attach the sprayer head to the shower head.
What You Will Need
-Pfister Shower Faucet
-1/4 inch NPT coupling
-1 inch male adapter
-Drill bit 1/8th inch in size
-Pfister shower faucet installation instructions
If you are replacing an existing Pfister shower faucet, remove it by unscrewing the plastic knobs on the side. If you are installing a new one, first measure the distance from the center of the hole in the wall to where you want the new faucet to be installed. Use this measurement and the diagram below to find your faucet model number and select the correct adapter. Note: The diagram shows a 1-inch hole; if your hole is 3/4 inches or larger, use the 1 1/4 inch adapter.
Once you have found your adapter, remove any old seals and washers with a screwdriver. Insert the adapter into the hole in the wall and screw on the seal and washer. Replace any missing screws. If you are replacing an old faucet, cut a piece of tubing to fit snugly over the spout and attach it with pliers.
How To Install A Pfister Shower Faucet
If you’re looking to update your bathroom with a new shower faucet, Pfister is a brand you may want to consider. If you’re like most homeowners, you probably have a Pfister shower faucet in your bathroom. Pfister is a well-known and respected brand for high-quality shower faucets, so it’s no surprise that they’re also some of the easiest to install. Here’s how to do it:
1. Unscrew the old shower faucet and remove it from the wall.
2. Measure the distance between the pipes on either side of the wall and mark it with a pencil.
3. Screw the new shower faucet into the marked position using the supplied screws.
4. Reconnect the water supply hose to the new faucet and tighten it up using a wrench.
5. reconnect the drain pipe to the existing sink hole and tighten up using a wrench.
6. Reinstall any necessary trim pieces around the edge of the new shower area and you’re done!
Tips and Tricks for Installing New Shower Faucets
Installing a new shower faucet can be a daunting task if you’re not familiar with the process. Here are a few tips to make the installation easier:
1. Make sure you have all of the necessary parts before starting. You’ll need a wrench for the nuts on the hose bibs, pliers for the O-ring and installation screws, and a pipe cutter or saw.
2. Be sure to unplug the water supply before beginning.
3. Remove any old hardware or caulking from around the tub and shower area.
4. Locate the two hose bibs on either side of the tub enclosure. On most models, these will be attached by bolts that protrude through the wall and into threaded holes in the bibs. Use a wrench to remove the bolts and then remove the hoses from each bib.
5. On most models, there are four installation screws located near each corner of the tub enclosure (two per side). Use a wrench to remove these screws and then pull up on the tub enclosure to free it from the cabinet walls.
6. Carefully lower the tub enclosure onto the new faucet assembly while
Save Money on Replacement Elements
If your Pfister shower faucet is showing its age, it’s time to replace the old parts with new, better ones. Replacing a shower faucet is an easy and affordable project that can improve your bathroom’s overall look and feel. Here are instructions on how to install a Pfister shower faucet:
1. Shut off the water supply to the shower area by turning off the valve near the main water line. If you have a dual system, turn off both valves.
2. Remove the old shower head by unscrewing it from the stem. Save the cartridge and installation hardware for later use.
3. Remove the old spray arm by unscrewing it from the stem below the spray head. Save this too – you’ll need it to replace the arm later on.
4. If you have a ceramic cartridge body, remove it by breaking it in two along its natural seam using a hard object like a screwdriver or hammer. Rinse it off and dry it well before replacing it with a new one. If you have an acrylic cartridge body, simply break it apart and discard both pieces – there’s no need to clean or dry them first!
Conclusion
When it comes to showering, there are a lot of options available to you. However, not all of them are ideal for every person. If you’re looking for an easy and straightforward way to install a new shower faucet, then you should consider installing one using the Pfister method. This simple process is easy to follow and requires only a few basic tools, so you will be able to get your new shower installed in no time at all.