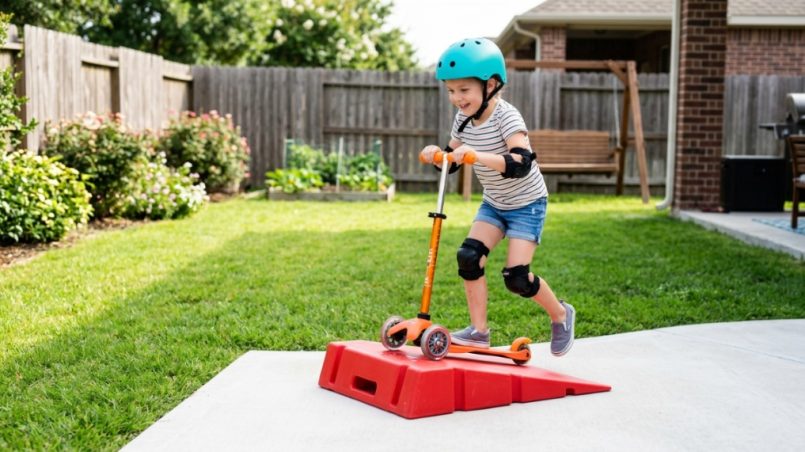
Yes, a budget ramp is absolutely worth it for most families. You do not need to spend hundreds of dollars to give your child a safe and fun riding experience. The best budget ramp kids’ options focus on durable materials, stable construction, and appropriate sizing rather than flashy extras. Many affordable ramps perform just as well as premium models for beginners and intermediate riders.
Why Budget Ramps Work for Kids
Children grow quickly and their skill levels change fast. A budget ramp allows you to test their interest without a major financial commitment. Most kids under twelve do not need professional-grade ramps. A well-built budget ramp provides enough stability for learning basic tricks and building confidence.
Common Misconceptions About Cheap Ramps
Many parents assume cheap means unsafe. That is not true. Many affordable ramps use the same high-density polyethylene or marine-grade plywood as expensive models. The difference usually comes down to brand markup, extra features, or fancy graphics. Focus on weight capacity, base width, and surface grip instead of price.
When to Upgrade to a Premium Ramp
If your child outgrows the ramp within six months or starts attempting advanced tricks, consider upgrading. However, for most kids aged four to twelve, a budget ramp will last one to three years. That is plenty of time to develop skills and decide if skateboarding or biking is a long-term hobby.
What Features Make a Budget Ramp Safe for Kids?
Safety is the most important factor when choosing a budget ramp. Look for ramps with non-slip surfaces, wide bases, and rounded edges. A safe ramp prevents accidents before they happen. The best budget ramp kids options always prioritize stability over style.
Non-Slip Surface Material
The riding surface should have grip tape or textured coating. Smooth plastic becomes slippery when wet or dusty. Check if the ramp includes grip tape pre-installed. If not, budget for adding it yourself. This small upgrade dramatically reduces fall risk.
Base Width and Stability Design
Measure the base width before buying. A narrow base tips over easily. Look for ramps where the base is at least 60% of the ramp length. Wider bases distribute weight better and prevent the ramp from sliding. Rubber feet or anti-skid pads add extra stability on concrete or asphalt.
Weight Capacity and Material Strength
Check the maximum weight rating. Most budget ramps support 100 to 200 pounds. Ensure the rating exceeds your child’s weight by at least 20 pounds for safety. Polypropylene ramps are lightweight but durable. Plywood ramps are heavier and more stable but may splinter over time.
Which Type of Ramp Is Best for Beginners?
For beginners, a small kicker ramp or a low-profile launch ramp works best. These ramps help kids learn balance and speed control without intimidating heights. The best budget ramp kids options for starters are typically 6 to 12 inches tall and 24 to 36 inches long.
Kicker Ramps vs. Quarter Pipes
Kicker ramps are portable and easy to store. They allow kids to practice jumping and landing. Quarter pipes are larger and require more space. They are better for building momentum and learning transitions. Start with a kicker ramp unless your child already has some experience.
Adjustable Ramps for Growing Kids
Some budget ramps feature adjustable height settings. These ramps grow with your child and offer more versatility. A single adjustable ramp can replace three fixed-size ramps. Look for models with locking mechanisms that hold the angle securely during use.
Foldable and Portable Ramp Options
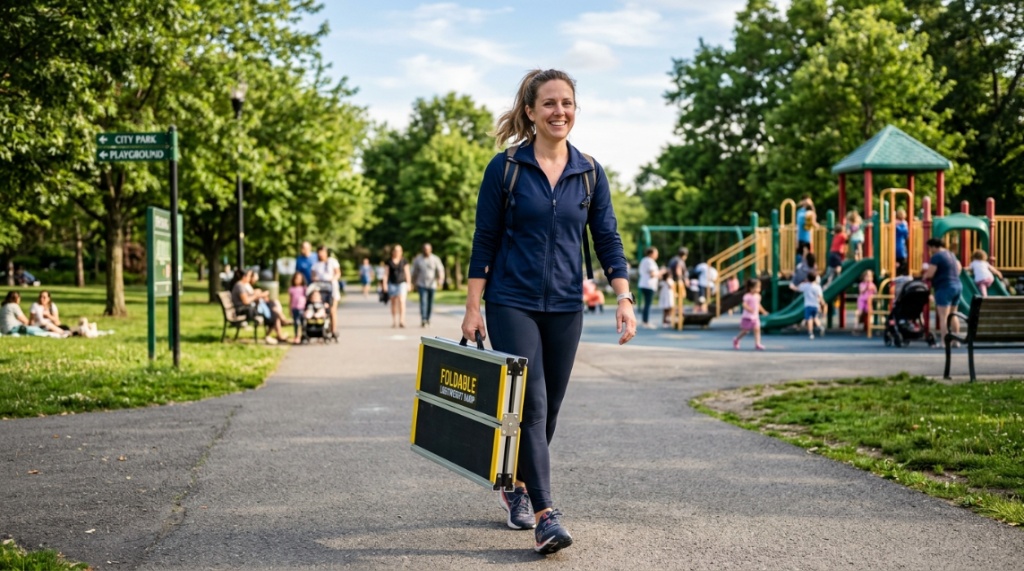
Foldable ramps are excellent for families with limited storage. They fit in car trunks and closets. Many budget-friendly foldable ramps use hinge systems that lock into place. Ensure the hinges are metal, not plastic. Plastic hinges break under repeated use,While ramps are perfect for developing balance and coordination, if your child is ready for a different challenge, consider checking out our Bouldering Wall Membership Options to keep them active year-round.
How Much Should You Spend on a Kid’s Ramp?
Expect to spend between $30 and $80 for a quality budget ramp. Anything under $20 is usually too flimsy for safe use. Ramps in the $50 to $70 range offer the best balance of durability and affordability. The best budget ramp kids options fall within this price bracket.
Cost vs. Quality Trade-Offs
Cheaper ramps often use thinner plastic that cracks under sun exposure. Slightly more expensive ramps use UV-resistant materials. Paying a little extra upfront saves money on replacements later. Ramps sold online may have higher shipping costs, so factor that into your budget.
Where to Find Affordable Ramps
Large retailers like Walmart and Target carry budget ramps under their store brands. Online marketplaces like Amazon have dozens of options under $60. Local skate shops sometimes have clearance sales on last season’s stock. Checking multiple sources helps you find the best budget ramp kids options near you.
Hidden Costs to Consider
Some ramps require assembly tools you may not own. Others need additional grip tape or ground anchors. Budget an extra $10 to $20 for accessories. Helmets, knee pads, and elbow pads are mandatory safety gear. Never skip protective equipment, regardless of ramp price.
Can a Budget Ramp Handle Both Skateboards and Bikes?
Yes, many budget ramps work well for both skateboards and bikes. Look for ramps with a wider riding surface, at least 24 inches across. Narrow ramps are unstable for bike tires. The best budget ramp kids options are designed as multi-sport ramps.
Width Requirements for Bikes
Bicycle tires are wider than skateboard wheels. A ramp that works for skateboards may be too narrow for bikes. Measure your child’s bike tire width. Add one inch on each side for margin. Ramps labeled “skate and bike” typically have 24 to 30 inch widths.
Ramp Angle and Bike Safety
Bikes require a shallower ramp angle than skateboards. A 15 to 20 degree angle is ideal for bikes. Steeper angles cause front wheel lift and potential flips. Check the product specifications for angle measurements. Avoid ramps over 25 degrees for bike use.
Durability Under Repetitive Impact
Bikes exert more force on ramps than skateboards due to heavier weight and larger wheels. Budget ramps designed for both activities use thicker materials. Look for ramps with reinforced edges and cross-bracing underneath. These features prevent cracking and warping over time.
How to Measure the Right Ramp Size for Your Child
Measure your child’s height, weight, and skill level before buying. The ramp height should match your child’s confidence, not their age. A ramp that is too tall causes fear, while one too short becomes boring quickly. The best budget ramp kids sizes range from 6 to 18 inches in height.
Height Guidelines by Skill Level
Complete beginners should start with 6 to 8 inch ramps. Intermediate riders can handle 10 to 12 inch ramps. Advanced kids may enjoy 14 to 18 inch ramps. Always err on the shorter side when in doubt. Kids gain confidence faster with small successes.
Length and Run-Up Space Requirements
The ramp length affects how smoothly kids roll onto it. Longer ramps provide a gentler incline. Shorter ramps feel more abrupt. Ensure you have at least 10 feet of flat ground in front of the ramp for run-up. Indoor use may require moving furniture or using a garage space.
Weight and Portability Considerations
Children should be able to move the ramp themselves. A ramp that is too heavy stays in one spot and limits practice opportunities. Budget ramps weighing 10 to 15 pounds are ideal for kids. Heavier ramps require adult assistance and reduce independent play.
What Materials Hold Up Best on a Budget?
High-density polyethylene (HDPE) and marine-grade plywood are the best materials for budget ramps. Both offer good durability at low cost. Avoid ramps made from standard particle board or cheap ABS plastic. The best budget ramp kids options use HDPE for outdoor ramps and plywood for indoor use.
HDPE Plastic Ramps
HDPE ramps are lightweight, waterproof, and resistant to UV damage. They do not splinter or rust. The surface is naturally slippery, so you must add grip tape. HDPE ramps work well outdoors and in damp climates. They are the most common material for budget ramps.
Plywood Ramps
Plywood ramps offer a solid, stable feel. They are heavier than plastic but absorb impact better. Marine-grade plywood resists moisture. Standard plywood warps when left outside. Plywood ramps are best for indoor or covered areas. They can be painted or customized easily.
Metal Frame Ramps
Some budget ramps use a metal frame with a plastic or wood surface. These offer good stability but can rust if the coating scratches. Metal ramps are heavier and more durable long-term. They are a good middle ground between plastic and wood options.
Where Should You Set Up a Kids Ramp at Home?
Choose a flat, level surface with no obstructions. Driveways, garages, and paved patios work well. Avoid grassy areas because the ramp sinks unevenly. The best budget ramp kids setups include a clear run-up zone and a soft landing area.
Indoor Setup Considerations
Indoor ramps need at least 8 foot ceilings to prevent head injuries. Remove breakable objects nearby. Use a foam mat or old mattress behind the ramp as a backup landing zone. Ensure the floor is non-slippery. Carpeted areas may cause wheels to catch.
Outdoor Setup Safety Tips
Outdoor ramps must sit on dry, clean surfaces. Wet concrete or asphalt causes slipping. Check for cracks or debris in the riding path. Place the ramp facing away from roads, driveways, or steep slopes. Supervise outdoor sessions until your child is confident.
Storage and Weather Protection
Budget ramps degrade faster when left outside. Store them in a garage, shed, or under a covered porch. UV rays crack plastic over time. Rain causes plywood to delaminate. A simple storage solution extends ramp life by years.
How to Maintain a Budget Ramp for Longevity
Regular maintenance keeps budget ramps safe and functional. Inspect the surface for cracks, splinters, or worn grip tape. Tighten loose screws or bolts monthly. The best budget ramp kids owners clean ramps after every few uses.
Cleaning and Grip Tape Care
Dirt and debris reduce grip tape effectiveness. Use a stiff brush to clean the surface weekly. Replace grip tape when it becomes smooth or torn. Most budget ramps use adhesive grip tape that peels off easily. Replacement tape costs under $10.
Checking for Structural Weakness
Look for cracks around screw holes and joints. Flex the ramp gently to test stiffness. If the ramp bends more than one inch under hand pressure, it is weakening. Replace immediately to prevent collapse during use. Budget ramps typically last one to two years with regular use.
Replacement Parts and Repairs
Some budget ramps sell replacement parts like hinges or rubber feet. Contact the manufacturer before discarding a broken ramp. Simple fixes like adding a plywood patch or replacing grip tape can extend life significantly. DIY repairs are cost-effective for handy parents.
Frequently Asked Questions
What age is appropriate for a kids ramp?
Children as young as three can use ramps under supervision. Most budget ramps suit kids aged four to twelve. Always match ramp height to skill level, not age. Younger children need shorter, wider ramps for stability.
Can a budget ramp be used on grass?
No, grass causes the ramp to sink and shift during use. The uneven surface increases fall risk. Always place ramps on hard, flat surfaces like concrete, asphalt, or pavers. Use a large plywood sheet under the ramp on soft ground.
How long do budget ramps typically last?
With proper storage and maintenance, budget ramps last one to three years. HDPE plastic ramps last longest. Plywood ramps degrade faster in outdoor conditions. Heavy daily use shortens lifespan to about six months.
Do I need special shoes for ramp riding?
Yes, closed-toe shoes with flat soles are best. Avoid sandals, flip-flops, or shoes with thick treads. Skate shoes or athletic shoes work well. Proper footwear improves grip and prevents foot injuries.
Should I buy a ramp with or without grip tape?
Buy ramps without pre-installed grip tape only if you plan to add your own. Pre-installed tape saves time but may peel off faster. Self-installed grip tape allows you to choose quality brands. Both options work fine for budget ramps.
Can two kids use the same ramp at once?
No, never allow multiple children on one ramp simultaneously. Ramps are designed for single riders. The weight of two kids exceeds most budget ramp limits and causes instability. Wait until one child finishes before the next starts.
What is the best way to store a ramp long-term?
Clean the ramp thoroughly before storage. Disassemble foldable ramps if possible. Store in a dry, climate-controlled area. Cover with a tarp if outdoor storage is unavoidable. Proper storage doubles the lifespan of any budget ramp.