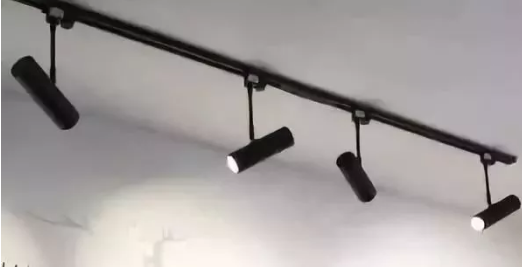
When you have a single celling feature but you need multiple connections for more light then track lighting will be the best solution without break the bank. Before seeking how to install tack lighting it is better to know about what is track lighting.
In track lighting system bulb have to track and bulb can move one place to another place by track. To move the bulb you need to install a track and connect to the power. With the track lighting system, you can install bulb where you need light.
Required tools
Tester: It is used to check the electricity is present in the wire or not. Checking is the first task for any electrical job. There are various types of testers with various features, for example, some testers have a light indicator and some testers have a sound system.
Ladder: Generally, track lighting is installed on the ceiling and as a human, it is hard to reach the ceiling. For this, a ladder is important as an associate tool. There are different kinds of the ladder but you need a light, foldable and adjustable ladder.
Bracket: Fit the ceiling fixture to hold the track
Bulb: There are various types of handle bulb and if you want to decorate you can use a light cover and case
Hacksaw: Generally, the build-in length of the track is 4 or 8 feet. But sometimes you need to cut off it to adjust. For this, you can use a normal hacksaw.
Drill: To drill the track and celling
How to install track lighting with corner
The corner is used to connect two individual tracks and also connect the power. So it is useful when you want to set multiple tracks in multiple places.
Step 1: Take a tester and check the power is on or off
Step 2: If the power is on then go to the power connect switch box and turn it off
Step 3: Again check the power is on or off with the tester
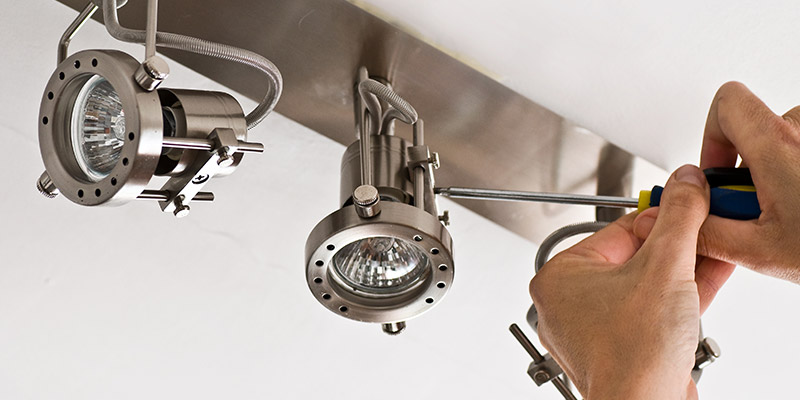
Step 4: Take a bracket, now set to the feature box and tight it
Step 5: Now select the point where you need to set screw
Step 6: Drill the point
Step 7: Before installing the track, connect the connector where you need
Step 8: The first screw will tight to the bracket through the track
Step 9: Then to well-secured the track tight the other screws
Step 10: Now connect the block wires with fixture wires (white wire goes to another white wire and the black wire goes to another black wire). This block is the connector between track and power.
Step 11: After connecting the block now secure it
Step 12: After secure everything now just connect the bulb
Step 13: To connect the bulb just pull down the holder then insert it into track now turn it 90 degrees and release the holder
Note: If you don’t find out the points for the screw then first install the track on the ceiling with a bracket. After that drill the ceiling through the track. This is the easiest and most accurate procedure.
Caution It is very dangerous when you deal with electricity. So before work you have to take protection. For this, you can wear leather shoes and gloves and always use a test before touching the wire.
You may also like to read Spreads Hub review about Living room lamps: The ideal lighting for a cozy living room.